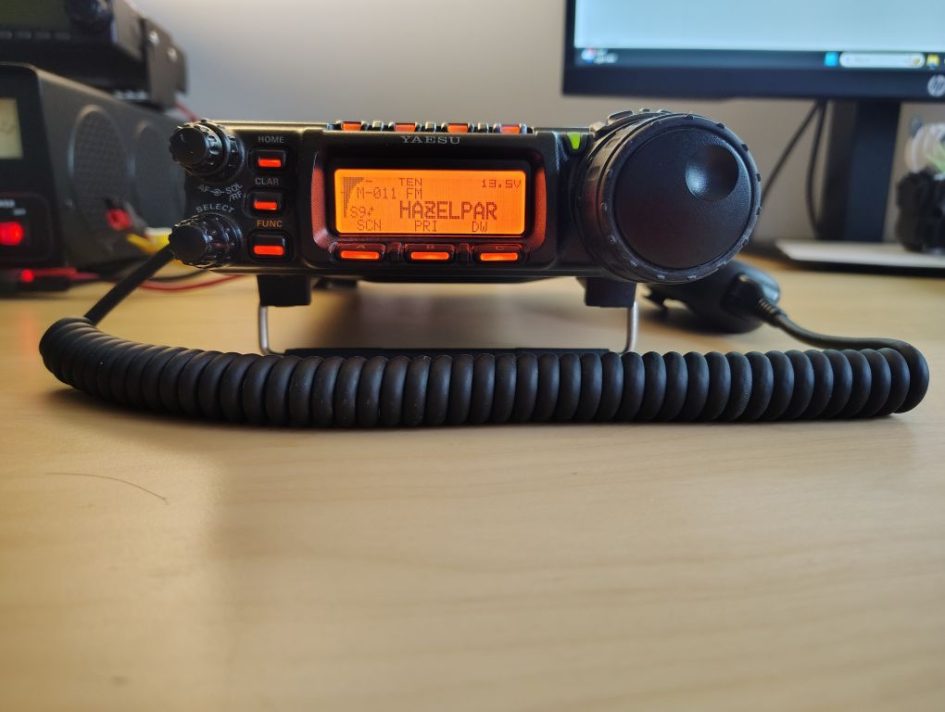
From a sale of a recent silent key I purchased a gently used Yeasu FT-857D radio. For me this was my first “shack in the box” style radio that covers HF, VHF and UHF. In the future I plan to either use this radio for either portable operations or installing into my truck as a mobile.
For now I temporarily have the radio setup in my shack and am using it regularly for VHF and UHF as an exercise in forcing me learn the in’s and outs on how to use this radio. With the capabilities of this new rig I dreaded the thought of having to individually program local frequencies and repeaters of interest. So I decided to take the plunge and purchase a programming cable and program the radio using CHIRP.
The Programming Cable
On black Friday, I decided to give an inexpensive, programming cable off of Aliexpress a try. For $8 shipped, I figured I didn’t have anything to lose. While I had to wait a few weeks for delivery, as the cable traveled from the other side of the world, I was surprised when the cable was delivered to my doorstep on Christmas morning.
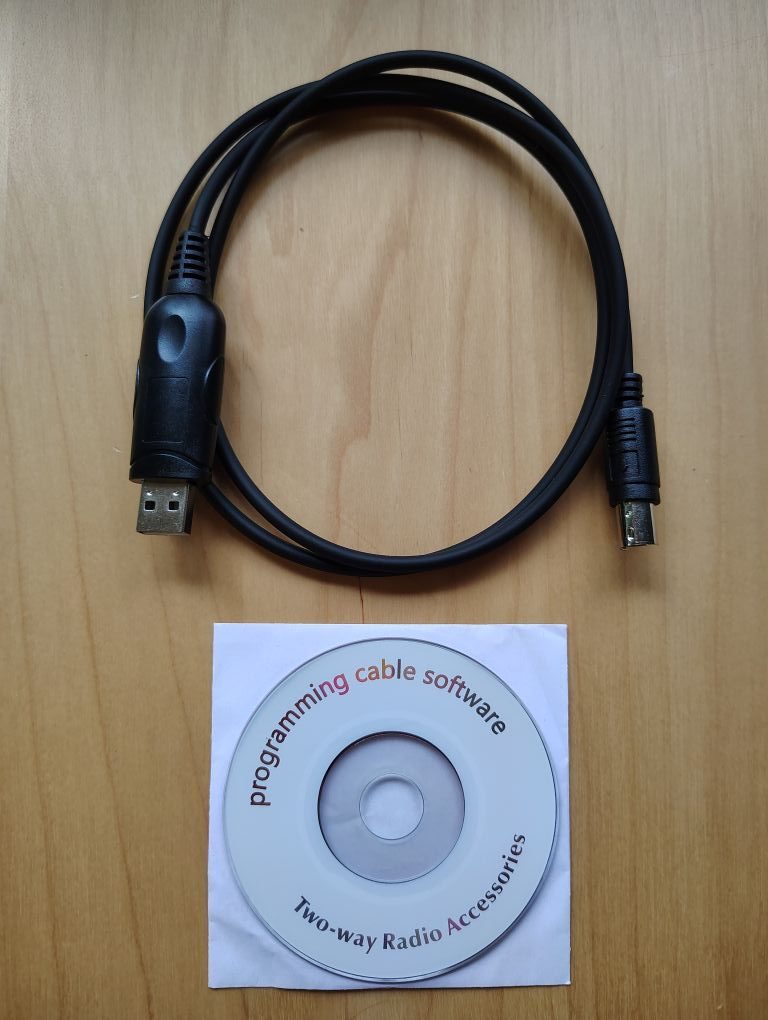
Figure 1. FT-857 Programming Cable
On initial inspection the cable seemed of moderate quality and would likely do the job of programming the radio. I don’t know if I would trust depending on the cable regularly in the field but for $8 its pretty much disposable.
Before using the cable on my radio I plugged it into my Windows 11 computer and within a few brief moments Windows automatically recognized the serial to USB converter’s Prolific branded chipset. This made me happy as I was leery of loading whatever software maybe on the CDROM disk that was included with the cable.

Figure 2. Programming Cable – Prolific Chipset
If you aren’t aware the FT-857 uses a serial interface on the rear CAT/linear control connector on the radio. Unfortunately, most modern computers no longer have a user accessible serial interface. To overcome this problem, many of these cables have a built it circuit board that handles level conversion and converts serial from the radio to USB.
As far a chipsets that handle serial to USB conversion if you can get a cable with a genuine FTDI chipset this would be preferred as FTDI is the benchmark for these chips and you may experience less issues. It should be mentioned that about a decade ago FTDI allegedly updated a driver such that it would “brick” non-genuine FTDI chipsets rendering them useless. At this time a number of FTDI clones or fake chips were found on the market and ended up in many consumer of industrial devices.
The Software
For programming software I decided on using CHRIP (https://chirpmyradio.com/) primarily because it is open source and free. This software can be used to program most main stream amateur radios that include a CAT programming port.
When using the CHIRP download page (https://chirpmyradio.com/projects/chirp/wiki/Download), be sure to click on the correct download link and not a pesky advertisement.
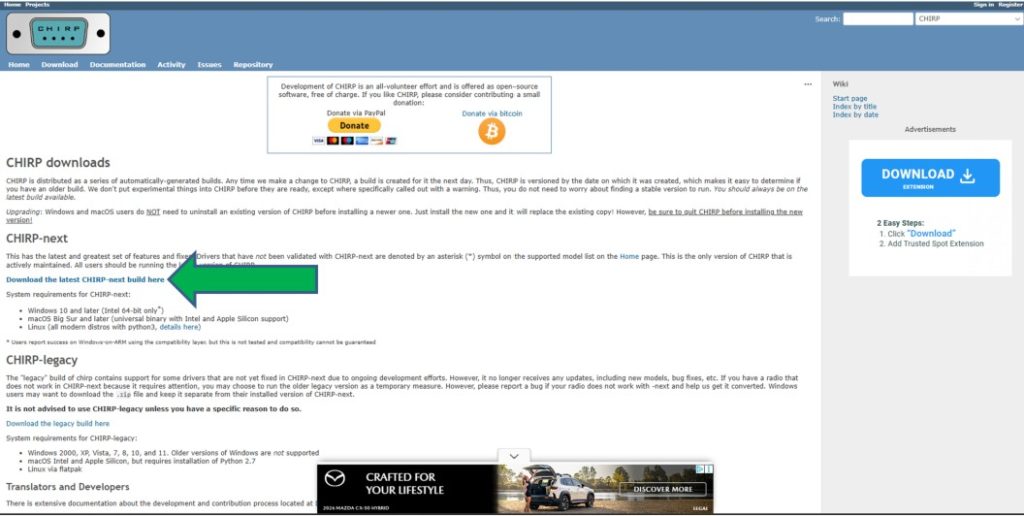
Figure 3. CHIRP Download
If you are looking for software that is a bit more refined and don’t mind a paid version, while I have never personally used it, RTSystems software comes highly regarded. A few things to be aware of with RTSystems is you need to purchase the software for each individual radio you want to program. If you go this route you will also need to purchase a cable from RTSystems and not an aftermarket cable.
The Process
Below is the basic process for programming using CHIRP and the Yeasu FT-857.
1. Locate the CAT port on the back of the radio and carefully observe the orientation of the connector contacts. Plug in the programming cable into the CAT port on the rear of the radio and connect the USB end to a computer. Be sure that you are plugging the cable into the CAT port and not the DATA port, doing so may cause you to bend pins on your programming cable.
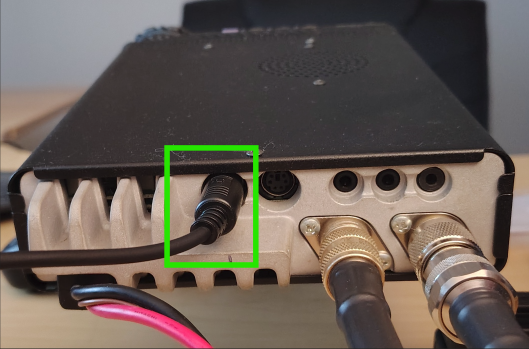
Figure 4. FT-857 CAT Port
2. While simultaneously holding the left and right arrow buttons power up the radio. This will power your radio up into clone.
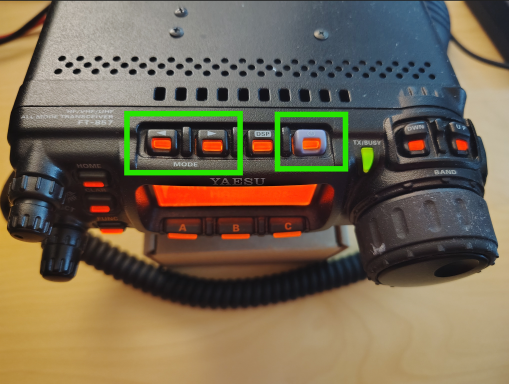
Figure 5. Clone Mode – Left Right Arrow Buttons and Power
3. Start CHIRP
4. Its best to start a a new programming template is by pulling an existing template directly from the radio. To do so, within CHIRP, select Radio > Download from radio.
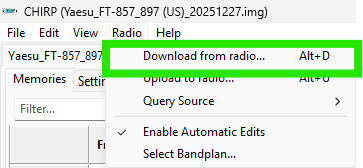
Figure 6. CHIRP Menu – Download from Radio
5. Select the COM port that the cable enumerated to and enter the remaining fields with the information from the radio and select OK.
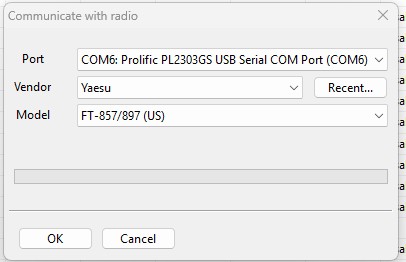
Figure 7. CHIRP – Communicate with Radio
6.When prompted by CHIRP to do so, on the radio (in Clone Mode) select SEND. At this point the radio will send its existing memory and memory format over to CHIRP.
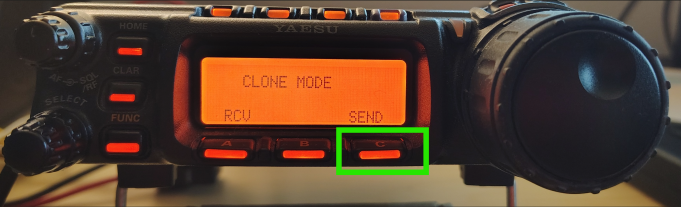
Figure 8. Clone Mode – Send
7. Within CHIRP you can now edit the memory channels in a quicker and easy to use format, with many similarities to editing an excel spreadsheet. Ill cover some of basics of the Memory Tab below.
Note: I am skipping some of the attributes that you will not use too frequently.
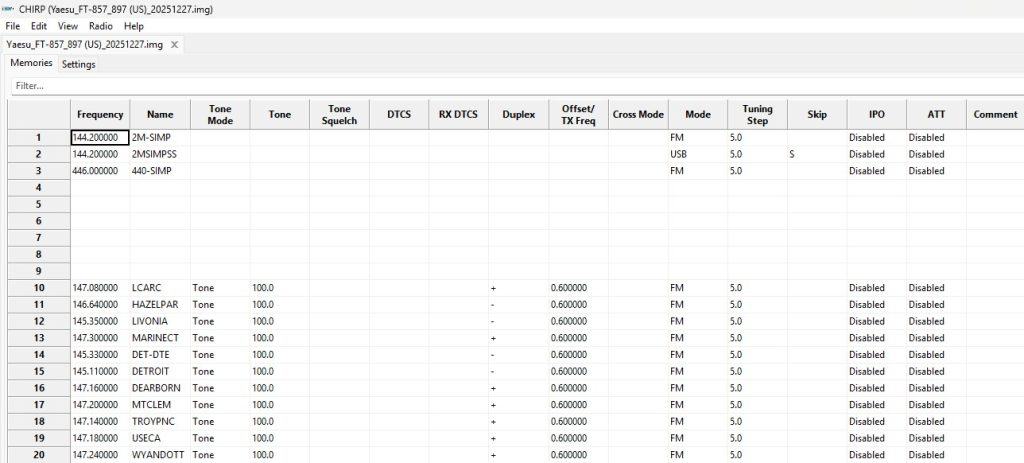
Figure 9. CHIRP Memories Tab
Frequency: This is the receive frequency
Name: Alpha numeric name to show up on the radio and is limited to 8 characters.
Tone Mode: Allows you to setup different types of tones. For example if you want to use a CTSS tone for accessing a repeater select Tone from the drop down.
Tone: If you have enabled Tone Mode (see above) select the tone frequency that you wish to use.
Duplex: If you are operating in a frequency range commonly used for repeaters CHRIP will often automatically fill out whether the transmit off set is + or -. If you are operating split where you are transmitting a receiving in two separate bands you can select split.
Offset/TX Freq: In many cases CHIRP will automatically fill this in based on common repeater offset standards.
If Duplex is set to + or -: Then this attribute will be the offset frequency.
If Duplex is set to split: Then this attribute will be the transmit frequency
Mode: The type of modulation you wish to use, example: AM/FM/LSB/USB/FM, etc
Skip: S can be select if you want this memory channel to be skipped when the radio is scanning channels from the memory bank.
8. If you wish to modify some of global radio settings these can be modified using the Settings tab. I wont cover this section in much detail but you can find more information about each of the settings in the Yeasu manual.
9. Save your configuration by going to File > Save As
10. The next step will be to upload the configuration to the radio. To do so, again enter the radio into clone mode by pressing the left and right arrow buttons on the radio simultaneously and power up the radio.
Figure 10. Clone Mode – Left Right Arrow Buttons and Power
11. Once in clone mode, on the radio select RCV. Within CHRIP go to Radio > Upload to Radio.
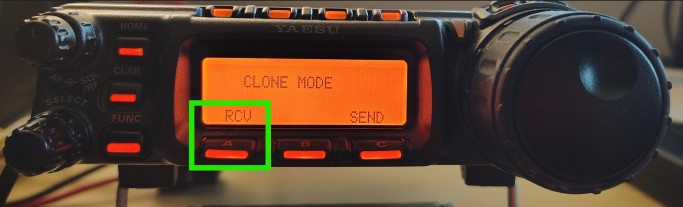
Figure 11. Clone Mode – RCV
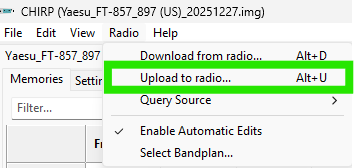
Figure 12. CHIRP Menu – Upload to Radio
12. When the Communicate with radio window appears, again, select the COM that the cable enumerated to, ensure that the vendor and model fields are correct and press OK.
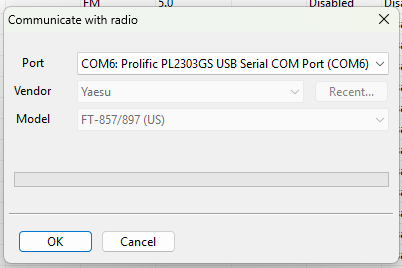
Figure 13. CHIRP – Communicate with Radio
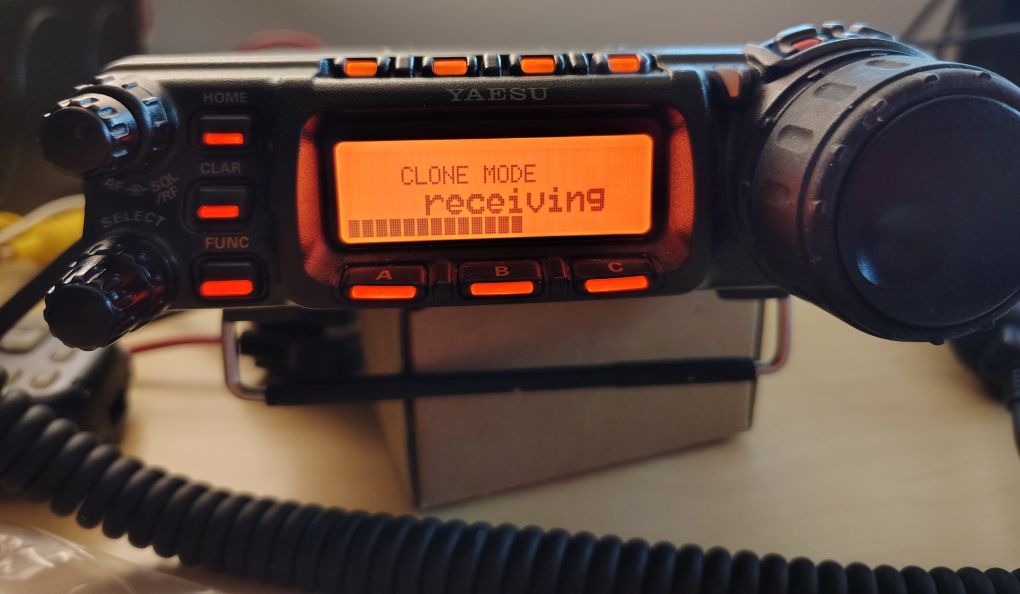
Figure 14. Radio Receiving Memory Data
13. At this stage your radio should have your new memories loaded onto it. If you find you need to make an update you can easily edit the CHIRP and re-upload it to the radio.
From following this process I’m sure you will no longer dread the days of having to manually input each of radio memories individually.
’73!