The next step in the process is to start depopulating the vacuum tubes. As the tubes are depopulated feel free to use the section as a reference.
Tube Locations, Part Number and Functions
Reference designators are a short hand identifier used to help uniquely identify each of the components on both the schematic and physical circuit board. These identifiers begin with a letter and end with a number. The letter indicates the component type and the number indicates the unique instance of the component. Some common reference designator letter identifiers used with the HW-100 and HW-101 are as follows:
C: Capacitor
D: Diode
L: Inductor
T: Transformer
V: Tube
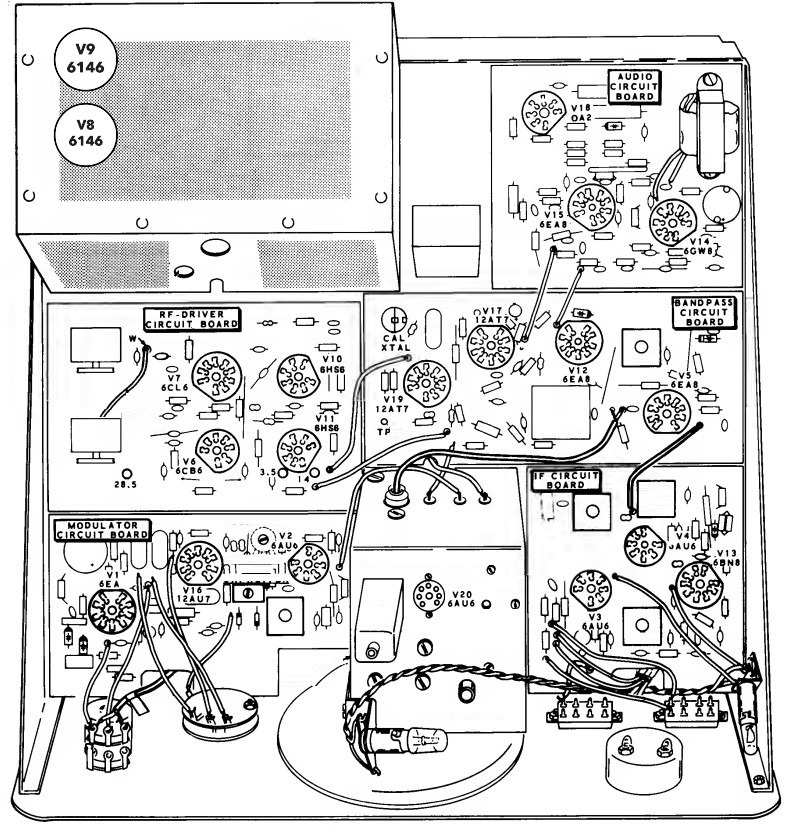
Below is a diagram that has been slightly modified from the original Heathkit HW-101 manual. This diagram is a good reference that indicates each of the tube locations by reference designator and the tube part number.
As an additional reference, below is a table of the various vacuum tubes in the radio along with their functions.
Table 1. Vacuum Tube Usage
| REFERENCE DESIGNATOR | VALUE | FUNCTION | TX/RX USAGE | LOCATION | NOTES |
|---|---|---|---|---|---|
| V1 | 6EA8 | AUDIO SPEECH AMPLIFIER AND BUFFER | TX | MODULATOR BOARD | TUBE SHIELD |
| V2 | 6AU6 | ISOLUATION AMPLIFIER | TX | MODULATOR BOARD | |
| V3 | 6AU6 | FIRST IF AMPLIFIER | RX & TX | IF BOARD | |
| V4 | 6AU6 | RX SECOND IF AMPLIFIER | RX | IF BOARD | |
| V5 | 6EA8 | FIRST TX MIXER | TX | BANDPASS BOARD | |
| V6 | 6CB6 | SECOND TX MIXER | TX | RF DRIVER | TUBE SHIELD |
| V7 | 6CL6 | RF DRIVER AMPLIFIER | TX | RF DRIVER | TUBE SHIELD |
| V8 | 6146 | FINAL RF AMPLIFIER | TX | CHASSIS CAGE | |
| V9 | 6146 | FINAL RF AMPLIFIER | TX | CHASSIS CAGE | |
| V10 | 6AU6 | RF AMPLIFIER | RX | RF DRIVER | |
| V11 | 6AU6 | FIRST MIXER | RX | RF DRIVER | |
| V12 | 6EA8 | V12A – SECOND RX MIXER V12B – RELAY AMPLIFIER | V12A – RX | BANDPASS BOARD | |
| V13 | 6BN8 | PRODUCT DETECTOR | RX | IF BOARD | |
| V14 | 6GW8 | AUDIO AMPLIFIER | RX | AUDIO BOARD | |
| V15 | 6EA8 | CW TONE OSCILLATOR AND AMPLIFIER | RX | AUDIO BOARD | |
| V16 | 12AU7 (ALT 5814) | CARRIER OSCILLATOR | RX & TX | MODULATOR BOARD | |
| V17 | 12AT7 | V17A – VOX AMPLIFIER V17B – CRYSTAL CALIBRATOR | RX | BANDPASS BOARD | |
| V18 | 0A2 (ALT 6626) | VOLTAGE REGULATOR | AUDIO BOARD | ||
| V19 | 12AT7 | HETERODYNE OSCILLATOR | RX & TX | BANDPASS BOARD | |
| V20 | 6AU6 | VFO AMPLIFIER | RX & TX | VFO |
Tube Shields
The radio includes three tubes that utilize tube shields. Beware that it is quite common to pick up one of these radios and one or more of these shields is missing.
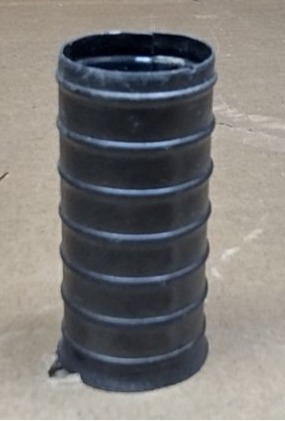
The purpose of the tube shields is to help eliminate RF from emanating or getting into the tube. Some symptoms that may occur without the tubes shields includes transmitter instability and undesired oscillation. A rig I worked on previously was missing these tube shields and would break away into oscillation when transmitting. Locating replacement shields resolved the problem. Reference information on these shields is provided in the table below.
Table 2. Tube Shields
| Heathkit Shield PN | Corresponding Tube Reference Designator | Dimensions Length x OD (Approximate) |
|---|---|---|
| 206-68 | V1 | 1.75in x 0.75in |
| 206-206 | V7 | 2in x 0.75in |
| 206-77 | V6 | 1.75in x 0.75in |
Organization
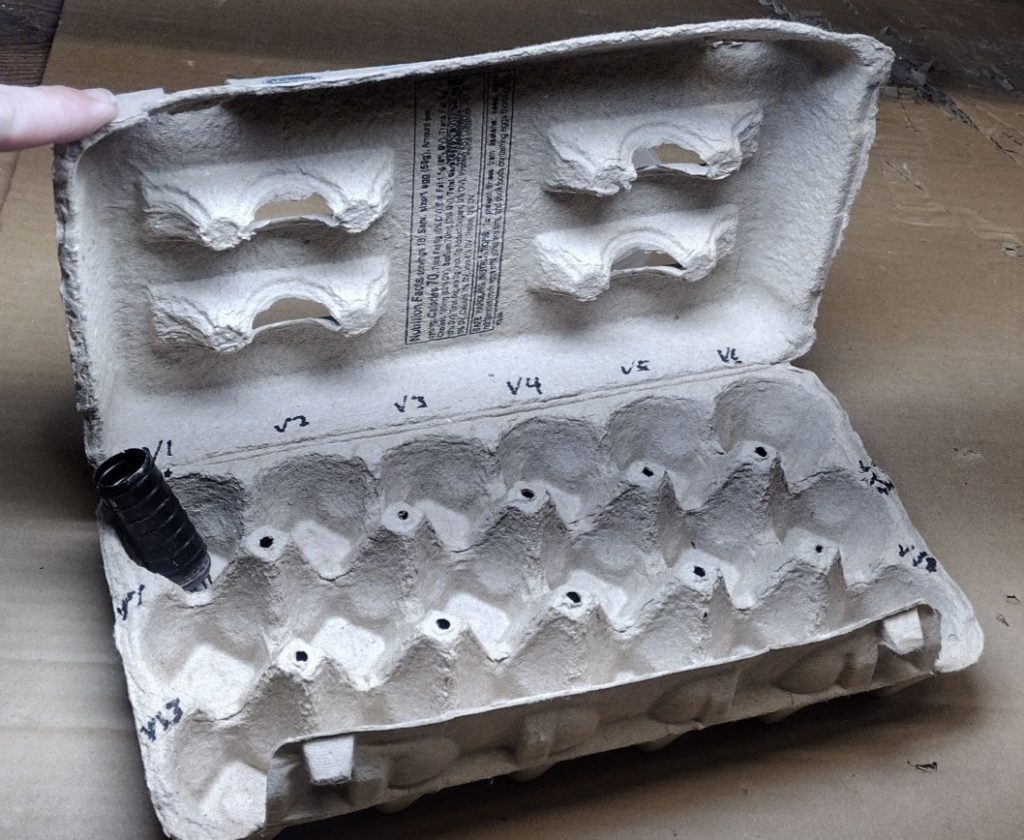
It is easy for the tubes to get mixed up with each other. To make matters worse it is easy to accidently have the tube part number marking accidently get removed during the cleaning phase. To stay organized I pull each of the tubes out in the order of their reference designators, starting with V1. As each tube is pulled it should get marked, I mark the reference designator of the tube with a fine point sharpie marker immediately as each tube gets pulled from the vacuum tube socket to prevent any mix ups.
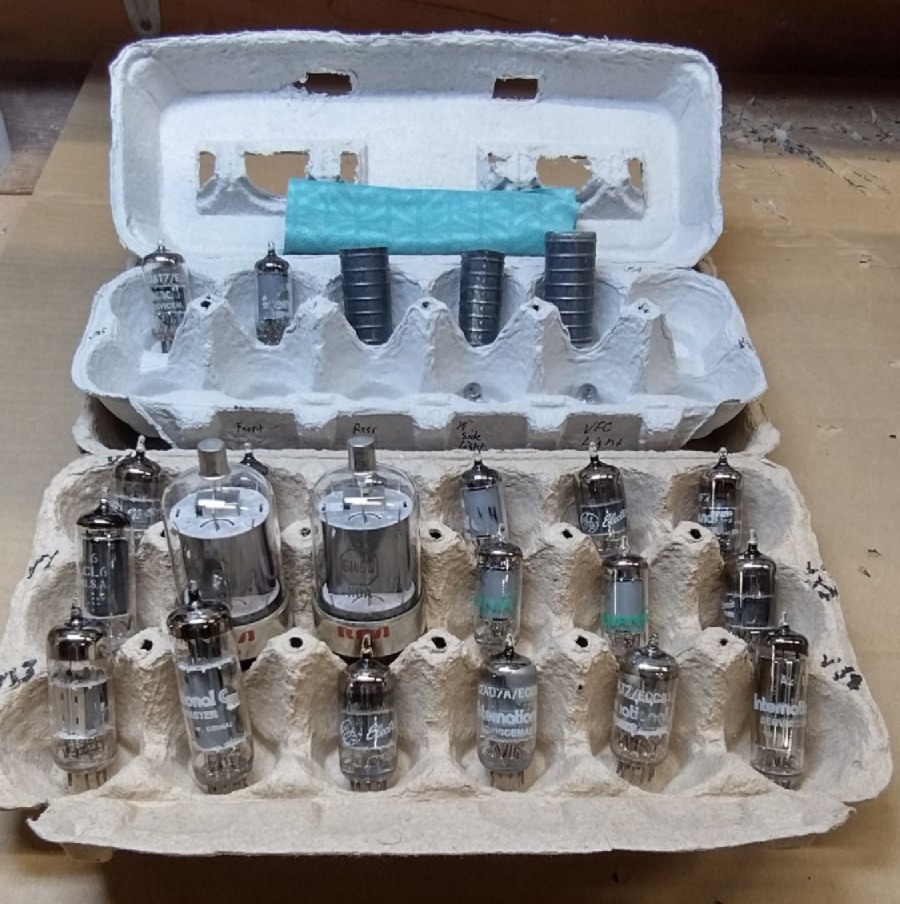
For all loose parts that get disassembled from the radio I use a set of labeled egg cartons as shown below. For the tubes I mark each position of the egg carton with the reference designator. I follow a similar process with items such as knobs and dials later on during disassembly. While I pull the vacuum tubes I also pull the two incandescent light bulbs at the same time. Its worthwhile to mention that the purpose of these #44 / #47 pilot lamps is not only provide illumination but they are also part of the tube filament circuit, thus if your radio is missing any of the pilot lamps you need to get a replacement.
Cleaning
One has to use an high degree of caution when cleaning up old vacuum tubes. Using cleaners or even simply water can cause the delicate markings on the tube to rub right off. For cleaning my tubes I carefully use either an old towel or eye glass cleaning cloth.
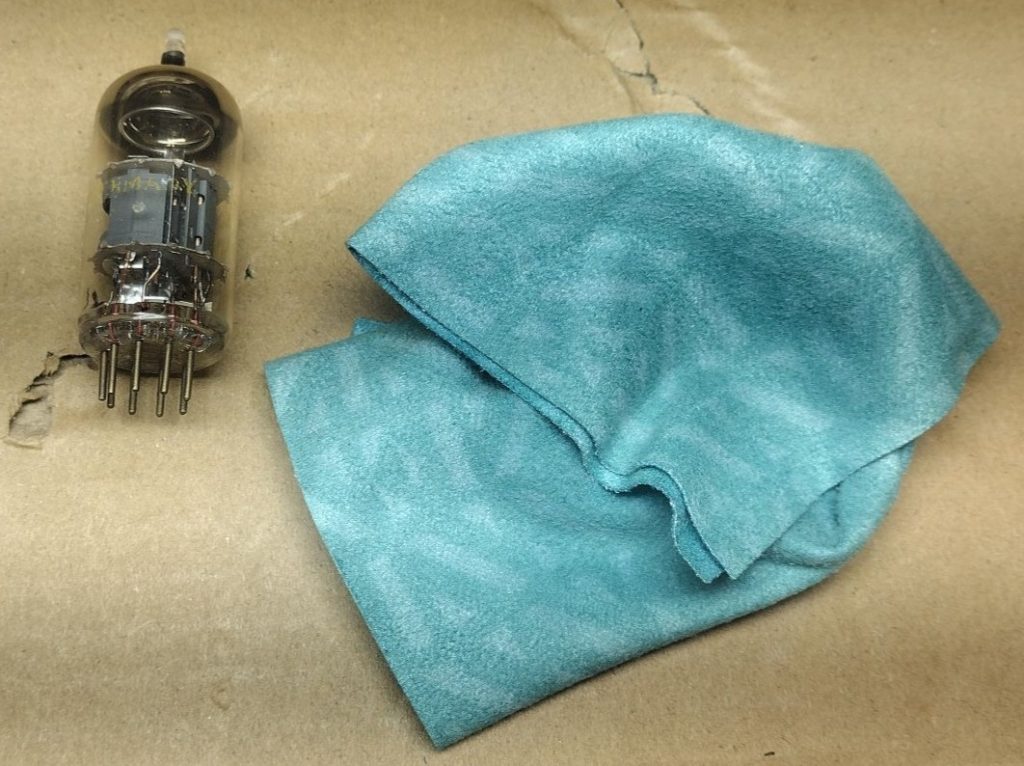
If the tube is really dirty I may use a slightly damp towel but make sure to completely avoid the areas of the tube markings.
Inspection
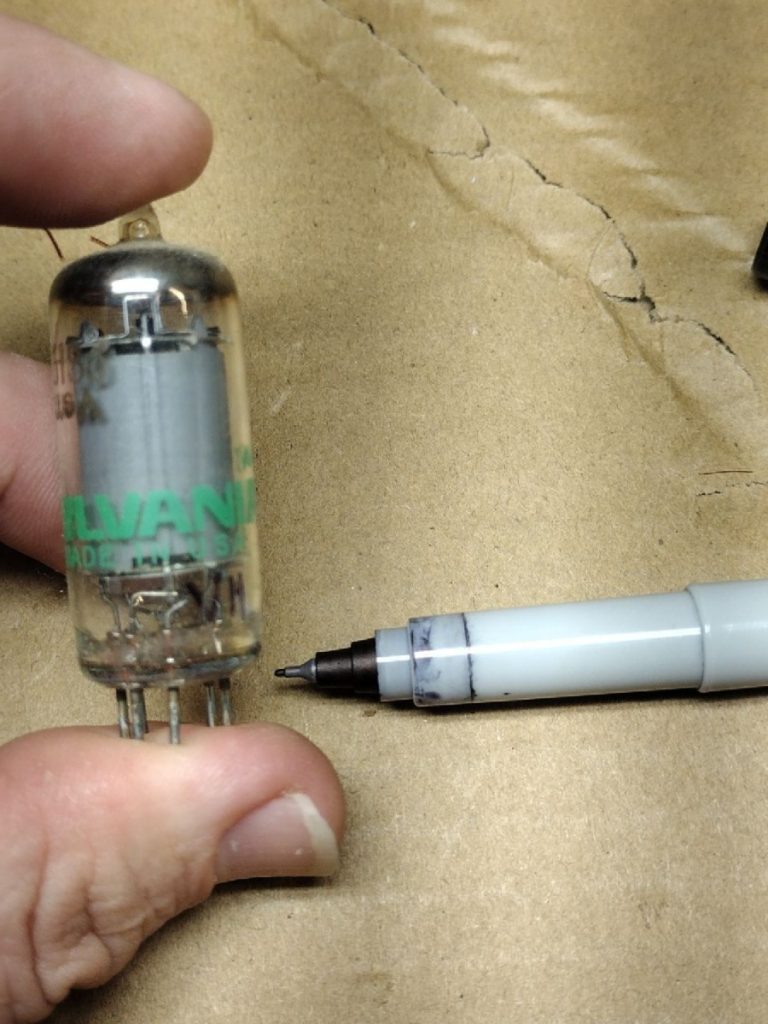
As I clean each of the tubes I carefully perform an inspection for obvious damage such as cracked glass.
The silver-black blob found on the tube is known as the getter and it can be located almost anywhere on the tube, including the top or side. The purpose of the getter is to help maintain the tubes vacuum and absorb any residual gasses that may develop inside.
If the getter is pure white this indicates that the tube has a leak and air has entered the tube and it will need to be replaced. For tubes that need to be replaced I note them in my general excel log file and put a small piece of blue tape with an X written on it and stick it directly on the tube.
Testing
It should be known that while a tube tester gives us a good indication on the function of the tube, the absolute best test for a tube is the final circuit. Later on during the re-assembly stage it will helpful to have a “known good” set of tubes available to test using substitution. For the time being we will test each of the tubes using a vacuum tube tester.
Testing – Getting A Tube Tester
You maybe asking yourself “where can I use or purchase a tube tester?”. Once upon a time simple tube testers were available for use at your local drug store. In the modern era you would be lucky to find one at your local electronics store but some stores still have them. Another option for getting access to a tube tester is quite simply to see if you can borrow one. If you are a member of a ham club you maybe able to use a tester from another ham. The last resort is to purchase a tube tester, this however isn’t the type of device you are going to find at Amazon, Digikey or Mouser. You will likely have to purchase a tester used, on the second hand market at places like at a ham swap.
Regardless of the tester you use you will need to get a hard or digital copy of the manual. Unless you use a tester regularly, without the manual it is not straight forward on how to setup the tester up for performing each test.
Testing – Tube Testers Types
There are a few different types of tube testers.
Emissions Testers: You will find that these types of testers are the most common and most inexpensive. They perform a few simple rudimentary tests for opens and shorts but perform testing of the tube function under more “static” conditions. The tester performs this test by connecting elements of the tube together and use the tube as a diode. The tester obtains a figure of merit by measuring the current flowing through the tube.
Mutual Conductance Testers: This type of tester is going to perform a more thorough test by using the tube under dynamic conditions and measures the tubes control of the electron flow. While this type of tester provides a more in depth test they are more costly than a more simple emission tester. If you are performing regular work on tubes than you should consider getting this type of tester.
Testing – Tester General Use
Testers will often have a number of sockets for each of the different types of tubes, they also include knobs and levers for setting up for the different type of tubes and tests, in addition to a roll chart that shows each of the settings required for a specific tube. Its helpful to note that online you can often find extended roll charts for most tube testers. These extended charts cover additional tube types not included on the initial roll chart that came with the tester.
One should avoid testing tubes that are in known non working condition where the glass is cracked and the getter is white, indicating air has gotten in, as these failures can stress the tube tester.
For each tube that needs to get tested I walk through each of the testing steps included in the testers manual. As a I test each tube I log its status (good/unknown/replace) in my excel log for the radio. For tubes that I know I need to replace I mark the tube with a piece of tape with an X on it and any tubes that are suspect get a piece of tape with a question mark.
Results
For testing the tubes from the HW-101 I am using a Heathkit TC-2 which is a simple emissions type tester. Currently this is my first and the only tube tester. When I was performing my first tear down of a HW-100 I was in the market for a tube tester and I simply found this tester at a Ham swap for a good price. I am keeping my eye out for a Mutual Conductance Tester in the future.
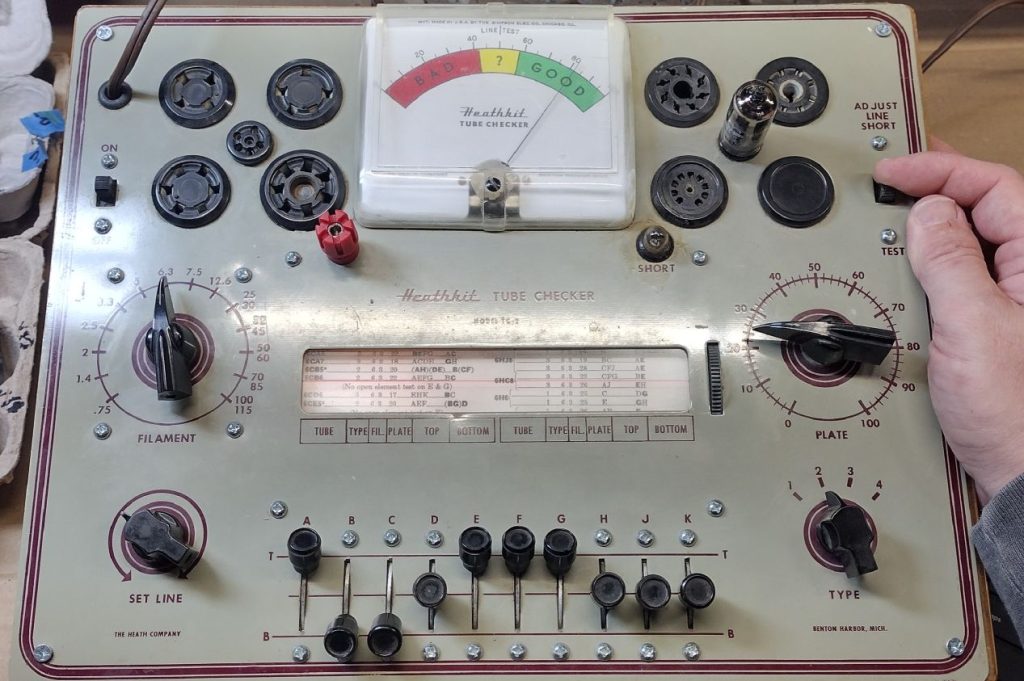
My Heathkit TC-2 performs basic tests for: Open/shorted elements, filament continuity and a quality test indicating the tube is in good/unknown/poor condition.
For this HW-101 most of the tubes measured as passing with V18 and V19 showing a few suspect readings which I will have to investigate further. I did notice that for my rig a number of the factory tubes had been replaced with alternate tube part numbers. I do need to take some time to verify these alternates and I am hopeful that the previous rig owner knew what they were doing.
Purchasing Replacement Tubes
So you have found that some of your tubes are no good or weak, what do we do now? When I find that I have a tube that is in need of replacement I immediate add it to an on-going shopping list that I keep on my phone. The tube supply chain isn’t the normal electronic supply chain and you wont have much success finding replacement tubes on Digi-key, Mouser or Newark.
While there are a few limited manufactures still making brand new tubes out of China and former Soviet states these manufactures are very limited. A sufficient piece of the vacuum tube supply chain is made up surplus tubes that while, old in age, are considered “new old stock” (NOS) as many have never been used before. We still have to be careful for aged NOS there is always a risk that the part may no longer perform and when purchase these or used tubes I always check them myself with the tester.
Below are a few links to some of the larger suppliers of vacuum tubes online:
Antique Electronic Supply
The Tube Store
Tube Depot
I personally enjoy purchasing tubes during electronic and ham swaps to include Dayton Hamvention. It is quite amazing how much NOS is currently available on the market. While its a bit of a gamble purchasing NOS, I find the scavenger hunt aspect of it and talking with the vendors of similar interest quite rewarding. Its quite fun hunting for a tube along side other hams that are on a similar adventure.
’73